Tuesday, September 18, 2012

PROJECT LIFE - "Week 9"

Welcome back to Project Life Tuesday

Week 9, 4th -11th August 2012, was filled with much excitement, as it snowed in my home country, South Africa.  It was apparently the first time in recored history that it snowed in all 9 Provinces on the same day.  Facebook was ABUZZ with comments and pictures of the snow from all over the country...


LEFT PAGE:


RIGHT PAGE:


Getting a dog was such a blessing for our family.  Matthew is just smitten with little Zinga :D


This was a picture that flew around Facebook on August the 7th.  It was of the lions in the Johannesburg Zoo, in the snow.  So stunning.


I dedicated a lot of time during the summer holidays to my Project Life album.  It was worth taking a photo of and documenting.


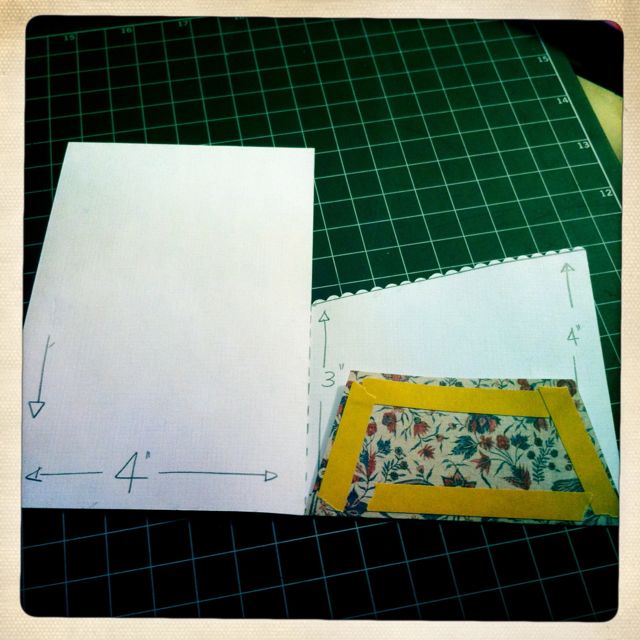
I decided to sign up for a class on Big Picture Classes.  It is the Amy Tangerine Creative Juices class.  It included several handouts with lots of ideas.  I really loved it and  made a mini book journal from one of the tutorials included in the class.  You can see my post on the mini book HERE.  I have recently used the mini book to record our 2 night getaway to Fujairah in the beginning of September.  I will be writing a post on the album soon.


Looking back on the summer Project Life pages, it appeared that a lot of my days were filled with food...a family friend has written a cook book, using recipes from his restaurant in Cape Town.  All the recipes are home food and totally delicious.  There are just a handful of recipes I have not tried as yet.  The ones I have done have been a huge hit in our home, with regular requests for one in particular, the Homemade Chicken Pie.  The restaurant is called Fraiche Ayers.  You can visit their website HERE.

Keep preserving your memories and Happy Scrapping!!

Jo


Saturday, September 15, 2012

SCRAPBOOK LAYOUT - Fearless

Up until about 2 months ago, my husband has been REALLY busy with work, and had not spent much time at home.  

Last October, he was on charter around the Middle East, and he had a night stop in Abu Dhabi, which is about an hour forty-five drive from where we live in Dubai.  We grabbed this opportunity, not only to get some time in with him, but also to have a little surprise mid-week break.

We got to the hotel on Yas Island (The home of the Grand Prix race track and of course the Ferrari World Theme Park), a few hours before he did, so we hung out at the pool.  I was doing my usual and being mama-razzi to the kids while they were having fun.

Shortly after that getaway, I started working and I didn't get an opportunity to scrap this photo of my son.  This was one of the first pages I scrapped when summer holidays started.


I kept it simple, and fairly color neutral because I really wanted the picture to stand out.  I used elements from printed paper from Paper Inklings (love their tween boy paper) and some bits and pieces from a Simple Stories 6x6" paper pad.


Happy Scrapping!!

Jo

Tuesday, September 11, 2012

PROJECT LIFE - "Week 8"

Welcome to Project Life Tuesday.  Today I would like to share Week 8.  It was an exciting week for us.  We got our first dog.  He is a rescue dog called Zinga and is a Chihuahua X Miniature Pinscher.

My husband and I have been married for 12 years, and have never really considered taking on a pet.  When we got married, both of us worked and didn't think it would be fair to get a dog and then leave it at home alone all day.  I stopped working when our first child was born, and then we had our hands full with a little on in the house.  Just as he got big enough for us to be able to share our love and attention, we added a little sister to the mix.

We then moved to Dubai, to a home which had no garden or outside area of any kind.  Two years ago we moved to a new home, with our own patch of grass, but felt that the time was not right to add to our family.

We are at a stage now where the children are old enough and responsible enough to help with taking care of our little added treasure and I am so glad we waited.  This little character is just right for us.  Small enough to think his garden is a farm, bouncy enough to be fun to play with, and loving and loyal enough to guard us while we sleep from his vantage point of the top of the stairs.....Yes, I am in love :D

LEFT PAGE:


RIGHT PAGE:


Summer holiday activity:  The kids made play dough, then proceeded to make me a FANTASTIC play dough dinner (Spaghetti & Meat Balls, Brownies and Waffle and Ice Cream and a special after dinner I Love You treat).  There is something special about a blue and purple dinner served on paper plates :D


Our little guy....He had his "manhood" taken as is mandatory by the Animal Rescue Centre and then had to wear this not so fashion forward lampshade...poor thing.


Fantastic scones and sushi at a friends house....yummy.


Our new family member moving in and sleeping on the pillow on my daughters bed.  (She somehow managed to sneak into my bed at some time during the night).


Found these little beauties through Pinterest.  I just couldn't resist using one of them as a title page for August.  Click HERE for a link to my Pinterest Printables Page.


Getting crafty with the kids during a super hot summer and dusting off the old bread machine, just for fun.


More crafty days and crumpets for lunch...


Finding a little "me" time and fiddling with my SMASH book.


Thanks again for stopping by.

Happy scrapping :D

Monday, September 10, 2012

TUTORIAL - Notebook

Hello :D

I love a pretty notebook.  I have notebooks and planners EVERYWHERE, and they all have a different purpose.  A notebook in the kitchen for writing down, well, things - one in my craft room for jotting down my "To-Do's" and notes on projects/blog posts - A Project Life planner, a Blog Planner and my day to day planner (yes - 3).

Today I would  like to share a notebook I was asked to do a tutorial on for Pretty Paper Studios.  I feel this would be nice as a gift (teacher's for example) or just to have around for your daily notes...

YOU WILL NEED:

2 sheets 6"x6" printed paper for the cover, embellishments and chipboard letter of your choice along with :-

12

1.  2 pieces of chipboard, cut to 6"x4 1/2".

2.  30 sheets of grid paper, taken from a store bought notebook, and cut in half (6"x4"). PLUS 2 untrimmed sheets for inside covers.

34

3.  3 pieces double sided printed paper/cardstock, cut to 6"x4".

4.  3 pieces 6"x4 1/2" printed paper/cardstock.

56

5.  3 pieces 8"x8" printed paper/cardstock to be used as pocket pages.

6. Assortment of tags.  3 tags,  6"x3" to be inserted in pockets, and 2 tags, 4"x2".

HOW TO MAKE IT:

78

7.  Take your 3 pieces 6"x4 1/2" printed paper/cardstock (POINT 4), and measure half an inch in from        the right hand side.  mark the first the sheet at 2" and the second at 4". 

8.  Discard areas marked with black lines in the picture.  Leave the third page.

910

9.  You will be left with 2 page dividers.

10.  Using one of the 8"x8" sheets, fold it in half and mark as show on the picture above. (Click here to link to a larger image).

1112

11.  You can use a decorative scissors to cut the pocket opening as I did here.  You can also alternate the opening from the right (shown here) to the left side so that your pocket opens on the other side.

12.  Adhere the flap to the inside of the alternate side of the tag.

1314

13.  This is the completed tag.  Repeat the process for the remaining 2 pieces of 8"x8" paper.

14.  Arrange your elements as follows: first divider page, tag pocket, 10 sheets note paper, 1 sheet 6"x4" printed paper, 10 sheets note paper...repeat.

1516

15.  Add the small manilla tags where desired.

16.  Cover the inside covers with grid paper, and cover the outside with the printed paper, folding over the small overhang to the inside of the book.

1718

17/18.  Embellish the front cover as desired.  Here attached a punched tag to the bottom right, over which I attached a strip of printed paper, then a strip of Washi Tape.  I used chipboard Thickers for the title.  You could personalize the notebook by using a person's name.

1920

19.  Bind using your preferred method.  You could ring bind it yourself or take it to a local stationers where they could do it for you, or you could bind it using O-rings (binding rings).

20.  A flip through, I added my 2 manilla tags at the front of the notebook.

2122

21.  One of the pocket pages.  In this instance, the pocket is on the reverse side.

22.  Pocket page with tag inserted.

Thanks for joining me on this tutorial.  I would love to hear from you, so please leave a message in the comments section :D

Happy Scrapping!!

Jo

Saturday, September 8, 2012

Handmade Journal

Welcome!!!

Today I have a little something different to share with you.  I am not a huge "mini-maker" but sure love them.  I like the way they look and the amazing things people do with their mini books.

I was browsing Big Picture Classes and saw an older class by Amy Tangerine called Get Those Creative Juices Flowing.  I was intrigued....

The first handout was for a journal made from scraps.  I just loved it!!!!

Here is how mine turned out....

It is largely made from scraps....The only thing I used which wasn't scraps was the 4" strip of printed acetate on the front cover.  This album is 6 x 6".


Look at all the different layers and sizes...drool!!


Yup, literally scraps of paper I had left over from a travel album I did last year!!!!


Now all I need is a journey to go on so I can take this with me and capture the moments!!!  HINT HINT.

Happy Scraping!!

Jo

Thursday, September 6, 2012

My (Crafty) Space

Hello friends!!!

We have been in our home for 2 years now, and my craft room has been ever evolving, and never quite right for the new space...With our "home makeover" in June, I decided to do some sorting in my craft room, and replace some things which were just not right for this space.  I am in a small room at the back of the house, which is inter to be a room for a live-in maid.  It is the perfect scrapping space for me....well....it is now :D

Once again, I used my FABULOUS new app, Hipstamatic.


I picked up these shelves for FREE just after we moved into the area.  Someone down the road had them lying outside at the bin.  I knocked on the door and found out they were throwing them out...WHAT A WIN!!!  I brought them home and the fitted EXACTLY on this wall, with just a teeny space on either side!!  I have many things on these shelves, from baskets with embellishments, inspiration books, flowers as well as some albums.  The small black files on the 3rd shelf down house my acrylic stamps, sorted into type...


Next is my desk.  I used to have trestle legs for the desk, and although nice, they were a little unstable.  I bought these drawers from IKEA and they are a blessing!!!  I have managed to ferret away so many things in the ample drawers.  Unfortunately the lighting is really inadequate in this room, so it is necessary to have an additional lamp on my desk.


My pinboard which homes a favorite layout at the time and anything else I need in sight.  The extra desks to the left are also a find from IKEA.  I have two desks as they are really tiny.  They have a shelf at the back which I presume is for cabling.  It is the perfect spot to house some projects which I am working on, and some display items like my SMASH* Books and an old Junque Journal I made about 2 years ago.


Below these desks is more shelving from IKEA.  It holds my Project Life caddy, a storage box with some stuff for SMASH-ing, and some boxes filled with brads.  My Cinch and Texture Boutique live in harmony on the bottom shelf.


This cupboard used to be inside my craft room and it took up a lot of space.  When I sorted out the craft room, I got rid of 2 sets of plastic drawers which stood in this place.  This is WAY neater, especially as this area is visible when you come into the house.  There is a door behind here which leads into the garage....We have never really used it so it's not a hassle that we no longer have access to it.  The entrance into my craft room is just to the left of the picture.


Yeah, I have a lot of scrapping stuff.  It is finally all nicely organized and neat.  This space REALLY makes me happy!!


One thing I have learnt from this process is that it is really necessary to get space specific storage.  The craft space I had in our old house was totally amazing, but the furniture just didn't work properly in our new house.  

On a side note, just as I completed sorting out my craft space, my wonderful loving husband asked me if I wanted to move my craft space upstairs, on to the landing.  His reasoning for this, the lighting is FANTASTIC!!! ,  I will have about twice the space AND I will be near him as his office is in this space.  Although this idea is intriguing, for now I am very happy in my little craft room...It is MINE, I can leave it messy if I want, just walk out and close the door.  But watch this space...The wanderlust in me ensures that I do not keep still for long and I am sure I will be feeling the itch to move before long....SIGH...

Wether your space to scrap is just a small section in the corner somewhere, or a FAN-DABI-DOZI craft room which is purpose built, it is a little piece of peace :D

Happy Scrapping!!

Jo